Explained
Handlebar Tape, Explained
After reading, you'll know how to pick a thickness, why it changes your lever reach, and which specs to look for on a gravel bar.
In this guide
Bar tape is the cheapest thing on a bike that changes how the bike feels, which is why it is worth five minutes of thought rather than a colour match. The useful news is that the deciding specification is published by everyone and usually sits in the product name. The part that catches people out is that tape does two jobs at once: it cushions your hands and it makes the bar fatter, and the second one quietly changes your reach to the brake levers.
The 30-second version
- Thickness is the spec, and it runs from about 2mm to 5mm across the whole category.
- Tape adds twice its thickness to the bar, because it wraps all the way round, so 5mm of tape means 10mm more diameter.
- Thicker tape lengthens lever reach, which matters most to riders with smaller hands and levers that have no reach adjustment.
- Width and length are rarely published, which is a real problem on flared gravel bars where a short roll runs out.
- What comes in the box varies, and an adhesive butterfly for the lever clamp area saves the part of the wrap most people get wrong.
The products this guide is about
Our verdict on each, with the full reasoning on the companion review.
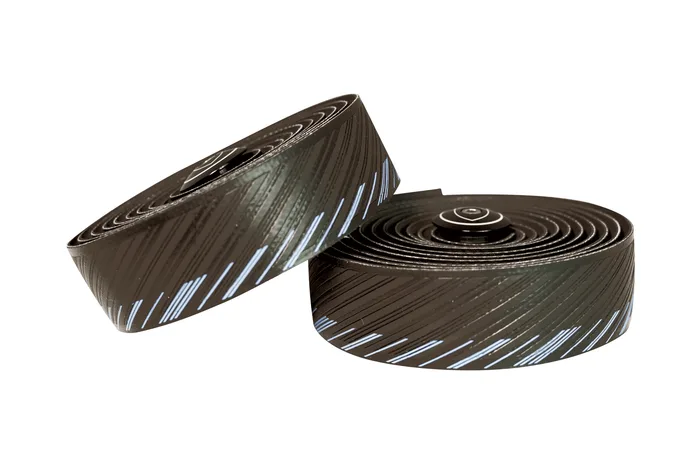
- Buy SILCA Nastro Cuscino 3.75 A 3.75mm laminated tape that comes with the pieces most wraps are missing, including a pre-cut adhesive butterfly for behind the lever clamps.
- Buy Fizik ComfortFeel 3.5mm Tacky Within a quarter of a millimetre of the SILCA for less money, with a tacky embossed surface and a stretchy material that forgives a first attempt at wrapping.
- It depends Prologo OneTouch The thin option and the only tape here that publishes a weight, which makes it the honest choice for riders who want to feel the bar.
- Skip Wolf Tooth Supple Bar Tape The most thoroughly specified tape here at 5mm by 40mm by 152cm, and the one whose own instructions warn that pulling it too hard will tear it.
What actually matters
- Thickness - how much material sits between your palm and the bar, quoted in millimetres. It is the main determinant of cushioning and the only spec published consistently across brands.
- Effective bar diameter - the bar plus two thicknesses of tape. This is what your hand actually grips, and it changes reach to the levers, so it is the hidden cost of a thick wrap.
- Material and construction - extruded foam, a bonded laminate, moulded polyurethane or solid silicone. These compress, recover and wear differently at the same nominal thickness.
- Surface finish - tacky, embossed, perforated or smooth. Tacky grips wet hands and collects grit; smooth stays clean and loses grip in the rain.
- Roll width and length - decides whether one roll covers one side of your bar. Standard drop bars are catered for by default; flared and very wide gravel bars are where short rolls run out.
- Box contents - finishing tape, end plugs and, on some kits, a pre-cut adhesive butterfly that covers the back of the lever clamp. These decide how tidy the finished wrap looks.
- Stretch - an elastic tape takes tension through the curve of the drops without wrinkling, which makes a first wrap far easier, but it can be pulled thin or torn if you overdo it.
The specs, in plain English
Green flags vs red flags
Green flags
- Thickness stated clearly, ideally in the product name.
- A width and a roll length published, which lets you check coverage on wide or flared bars.
- A stated box list including finishing tape, end plugs and ideally a butterfly.
- The same line offered in more than one thickness, so you can change your mind without changing brand.
- Any published wrapping guidance, such as a recommended stagger, which suggests the maker has thought about installation.
Red flags
- No thickness anywhere on the page.
- Comfort claimed only through adjectives, with no number attached.
- One thickness offered by a brand that sells tape as a comfort product.
- Nothing stated about what is in the box, which usually means tape and a bit of electrical tape.
- A tape sold for gravel with no roll length, since flared bars are where length actually bites.
Who's who: the brands
- SILCA - Builds tape as a bonded laminate rather than a single foam and ships the awkward extras, including a pre-cut adhesive butterfly and expanding end plugs.
- Fizik - Offers a clear thickness ladder from 2mm upward with tacky and classic surfaces, and describes its materials as elastic to make wrapping easier.
- Prologo - Publishes thickness and weight together, which is rare, and covers both thin textured tapes and three-dimensional moulded designs.
- Wolf Tooth - Makes a single very thick silicone tape and is the one brand here that publishes width and roll length along with detailed wrapping instructions.
How to read a listing without getting fooled
Read the product name first, because in this category it usually contains the specification: a number followed by mm is the thickness, and that is the decision. Then look for a width and a roll length, and treat their absence as a warning only if your bars are flared or unusually wide. Next find the box list and check whether finishing tape, end plugs and a butterfly are included, since buying those separately costs more than the difference between two tapes. Look at the surface description and match it to your weather rather than your taste, because tacky finishes grip wet hands and hold grit while smooth ones stay clean and go slippery. Finally, check whether the brand offers the same tape in another thickness, because that tells you they expect riders to have different preferences.
How much should you spend?
Budget tape is extruded foam, one thickness, a roll and a strip of electrical tape, and it does the job for a season. The mid-range is where you get a proper choice of thickness, a surface designed for wet grip, and materials that hold their shape rather than packing flat under your palms. The premium tier is buying one of two things: a laminated or engineered construction with a durability claim attached, or a complete kit where the butterfly, the finishing tape and the end plugs are all in the box. Since tape is a consumable you will replace more than once, it is worth working out your cost per season rather than per roll, and worth remembering that the right thickness at any tier beats the wrong thickness at the top of the range.
Questions, answered
Which direction should I wrap?
Start at the end of the bar and work toward the stem, overlapping each turn so the exposed edge faces away from the direction your hand twists under braking. Most instructions describe wrapping inward from the bar end on the top and outward at the drops. Get the overlap direction wrong and the tape peels back where your hands push hardest.
How much tape do I need for flared gravel bars?
More than a standard roll assumes. Flared bars are wider at the drops and the wrap has to cover a longer path, so a roll sized for a classic road bar can run out before you reach the tops. If the brand publishes a roll length, measure your bar and compare. If it does not, buying the wider or longer option is cheaper than buying twice.
Does tape colour affect anything but looks?
Only how quickly it looks bad. White and light tapes show chain grease, road grime and the marks from your gloves within a few rides, and no amount of cleaning fully reverses it. Dark tapes hide all of that and hide wear too, which cuts both ways when you are deciding whether to replace them.
Can I reuse tape after moving a cable or lever?
Sometimes, and it depends on the material. Self-fusing silicone can often be unwound and re-laid because it bonds to itself rather than to the bar. An adhesive-backed tape usually cannot, because the backing picks up dust the moment it comes off. If you know you are about to change cables, do that first and wrap afterwards.
Or jump to the head-to-head: SILCA Nastro Cuscino 3.75 vs Fizik ComfortFeel 3.5mm Tacky.